
SAP Web IDE (formally River RDE) is a Browser based development environment
SAP Web IDE, formally called the River RDE is a browser based development environment which lets you design, build, and deploy SAPUI5/Fiori web applications.
It is also part of the SAP HANA cloud trial so you can access a demo system for free and have a bit of a play.
The Web IDE has many benefits including no installation effort, code templates and best practices to build apps in the most
efficient way. Not only can applications be built rapidly the Web IDE offers integrated preview features and deployment
functionality.
The code editor also has extensive features built in such as WYSIWIG design, SAPUI5 code completion and
template wizard to provide a step by step process for automatically generation code and files. Follow simple steps below
to gain access to the free SAP trial system which is part of the open SAP course 'Build Your Own SAP Fiori App in the Cloud'.
Step 1 - Access the HANA cloud demo system
Go to URL https://supsignformssapicl.hana.ondemand.com/SUPSignForms/
while logged in, add any additional data required and accept the extra terms and conditions.
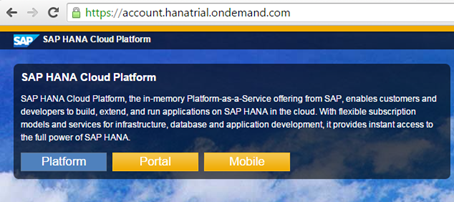
Step 2 - Register for SAP Value Prototyping
Next register for SAP Value Prototyping by going to the following URL while logged in
https://account.hanatrial.ondemand.com/register,
add any additional data required and accept the extra terms and conditions. This will send you an new username
an password via email.
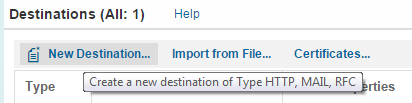
Step 3 - Setup destination
The destination enables you to connect with a remote backend systems (i.e. odata). Click
on the destinations link from the left hand column and click the 'New Destination...'link.
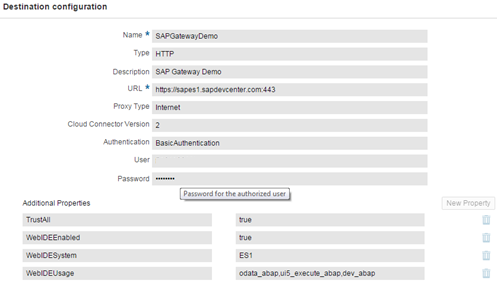
Now enter the following destination details. Note the user name and password will be the one that you have just been
sent via email.
| Name | SAPGatewayDemo |
| Type | HTTP |
| Description | SAP Gateway Demo |
| URL | https://sapes1.sapdevcenter.com:443 |
| Proxy Type | Internet |
| Cloud Connector version | 2 |
| Authentication | BasicAuthentication |
| User | <Your Username> Created in step 2 |
| Password | <Your Password> Created in step 2 |
Properties:
| TrustAll | true |
| WebIDEEnabled | true |
| WebIDESystem | ES1 |
| WebIDEUsage | odata_abap,ui5_execute_abap,dev_abap |
The destination details should look like this
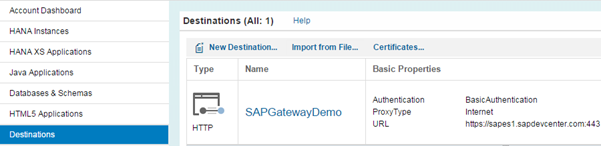
Press save and your new destination should be created
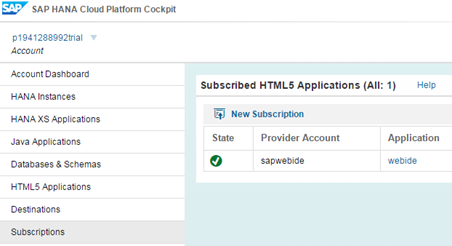
Step 4 - Login and go to subscriptions
Select the subscription link from the left hand column
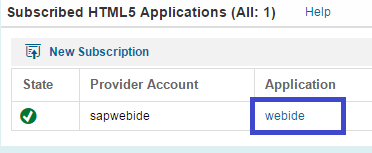
Step 5 - Access the Web IDE application
Now click on the webide application link
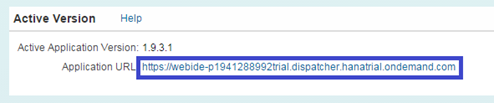
Followed by the Application URL on the resultant page
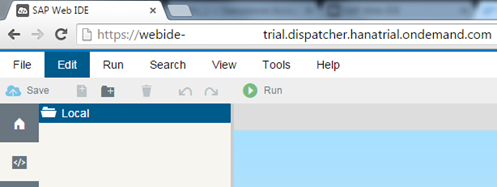
You should then be presented with the SAP Web IDE
Step 6 - Create your first Fiori application
See here for a simple step by step tutorial on Creating your first SAP Web IDE app
 SAP Fiori Intro
Install a local copy of the SAP Web IDE
SAP Fiori Intro
Install a local copy of the SAP Web IDE