My First ABAP WebDynpro - simple WebDynpro to display 'Hello world'
Below are the steps for creating a simple ABAP WebDynpro wihich displays the message 'HelloWorld' to the user.
Step 1
Execute transaction SE80
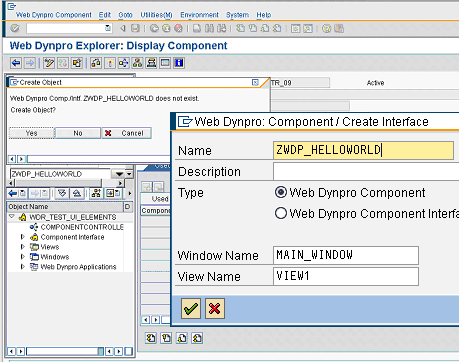
Step 2 - Create Web Dynpro component
Select Web Dynpro component/application from drop down and create new Web Dynpro component.
Give the window a name of your choice e.g. MAIN_WINDOW. Also depending on your version of SAP you may also have the option to
enter the default view as well. Give the view a name of your choice, i will use 'VIEW1' for this example. This view will then be
automatically embeded into the window. If you eneter a view here you can miss out steps 3 and 6.
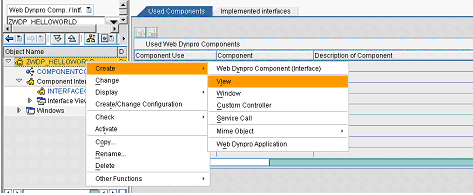
Step 3 - Create View
This step is not required if you entered the view name during the creation of your ABAP web dynpro(step 1). Within the context menu of the WebDynpro component and choose Create->View (VIEW1)

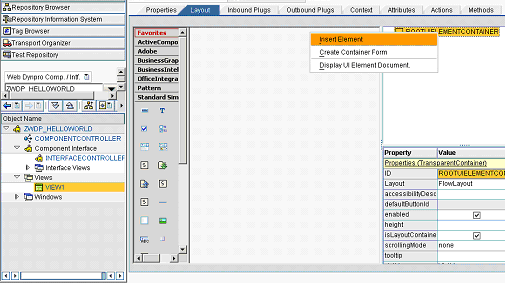
Step 4
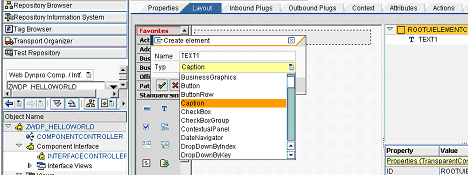
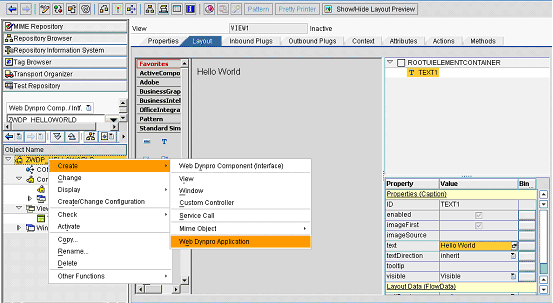
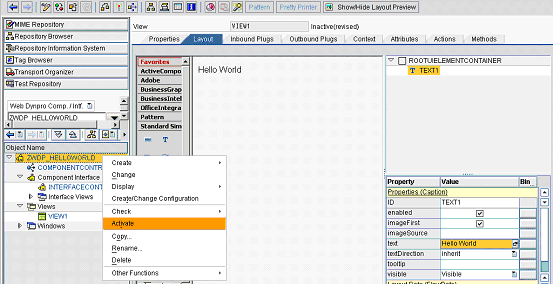
Within the layout tab of the view create a simple UI element of type CAPTION (VIEW1). To do this right click on the ROOTUIELEMENTCONTAINER within the UI element hierarchy (top right corner) and select Insert Element. Enter a name for the element and select type CAPTION.
Step 5
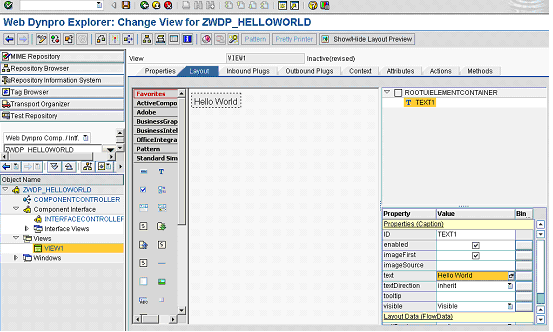
Double click on the CAPTION to maintain it properties list. Change its display text using the 'text' property to what ever you want e.g. 'HELLO WORLD'. Press enter to see these changes appear in the layout preview!
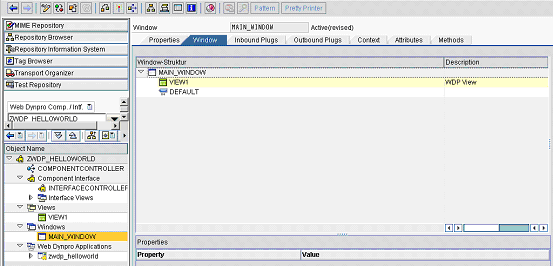
Step 6 - Make WebDynpro view part of the WebDynpro window
This step is not required if you entered the view name during the creation of your ABAP web dynpro(step 1), in which case go straight to step 7 otherwise follow instructions below.
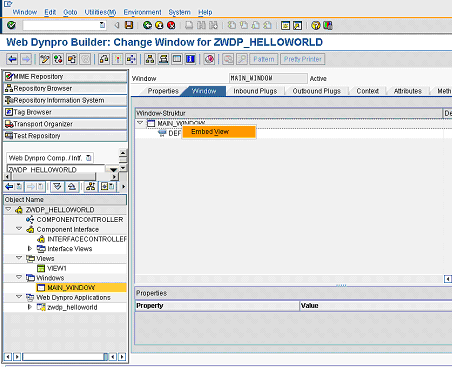
Edit the Webdynpro window and select the window tab(MAIN_WINDOW). In the window structure open the context menu for the Web Dynpro window and select 'Embed View'.
Display list of views available to be embedded
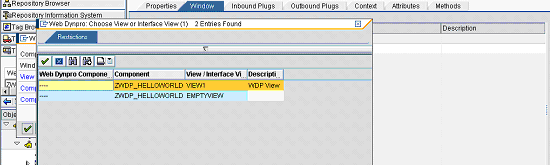
Click 'value help' button to display list of available views to add.

Choose view to add to window
Now select your view from the list.
The embed view popup will now be populated with the appropriate detials
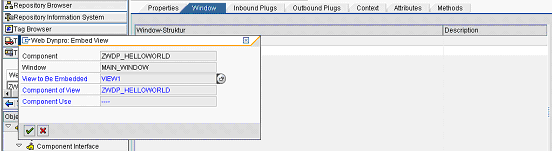
The view has now been embeded to the window
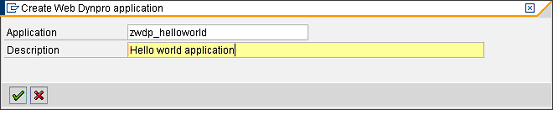
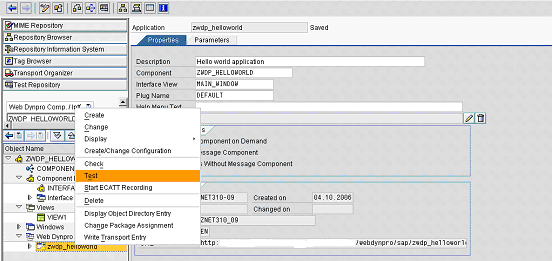
Step 7 - Create web Dynpro application
Step 8 - Save and activate everything
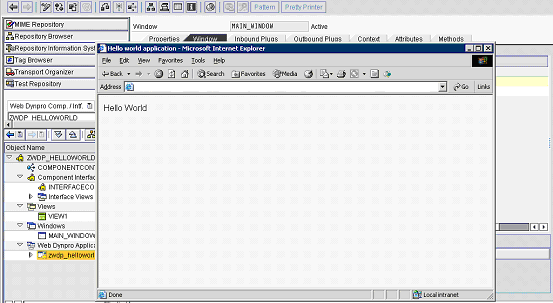
Step 9 - Test your WebDynpro (WDp)
Step 10 - Result