SAP BDT to create a new Tab on GMGRANT the grants management master data transaction
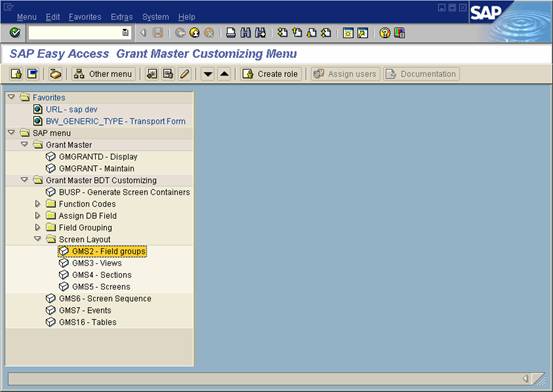
� Execute grants management BDT development transaction (GRANT_CUSTOMIZE)
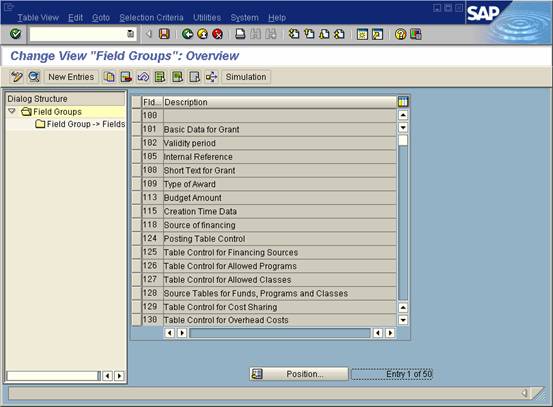
� Grant Master BDT Customizing-> Screen layout and select 'Field groups'(GMS2)
� Click on 'New Entries'
�
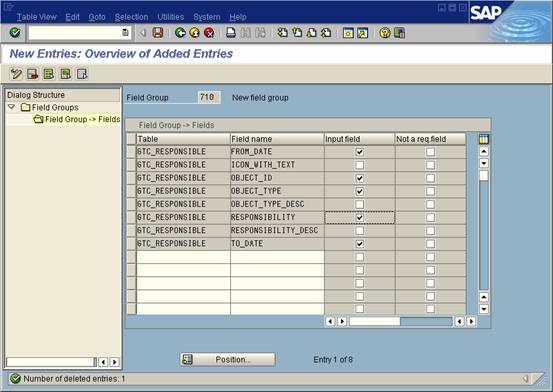
Enter details of new field group. For this
example it is going to be a copy of the
responsibilities tab, which uses a table control.

�
Go back to main field group screen, select your
new entry and double click on the
'Field Group-> Fields' folder option from the left column. Now enter your
fields, for this
example I have copied fields from responsibilities group.
�
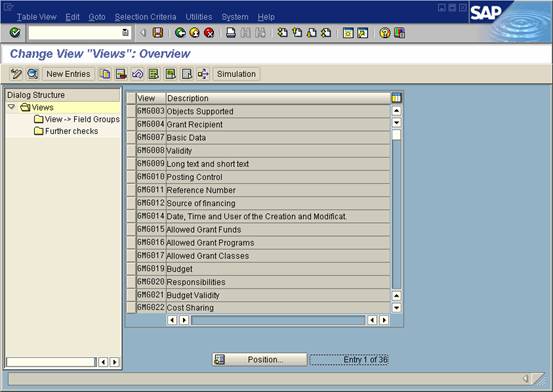
Return to main BDT customizing screen and select
'Views'(GMS3). Then click the
'New Entries' button
�
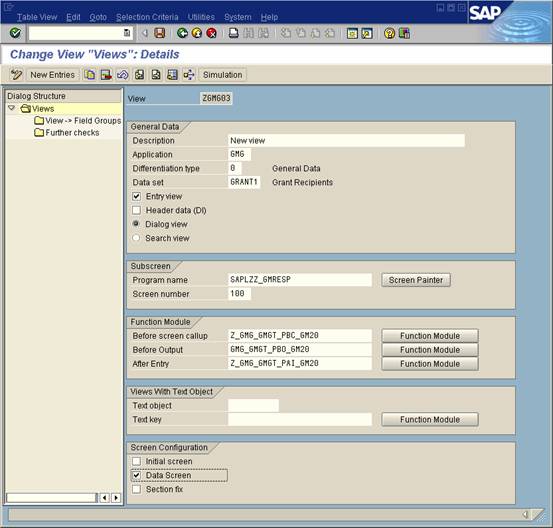
Enter view information, once again copied from
the responsibilities view, but calling
custom created versions of program, screen and function modules, which are
essentially copies of the SAP originals functionality.
�
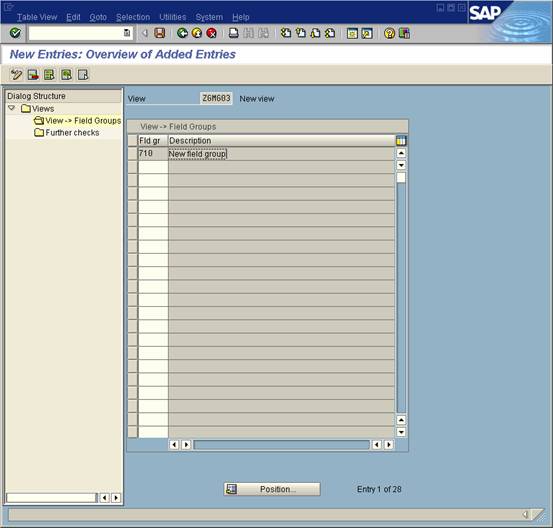
Go back to main Views screen, select your new
entry and double click on the
Views-> Field Groups folder option from the left column. Now enter the new
field
group you created previously.
�
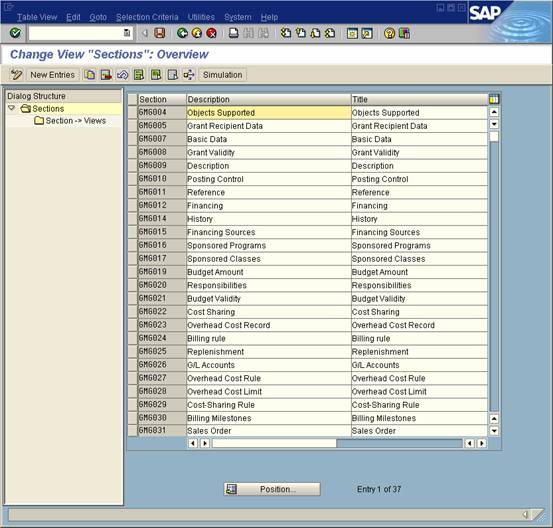
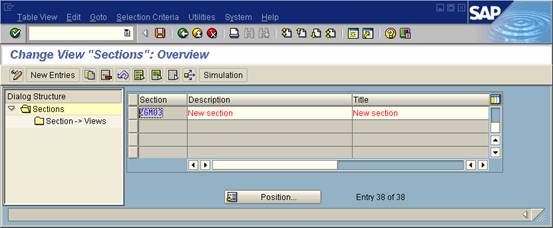
Return to main BDT customizing screen and select
'Sections'(GMS4). Then click the
'New Entries' button
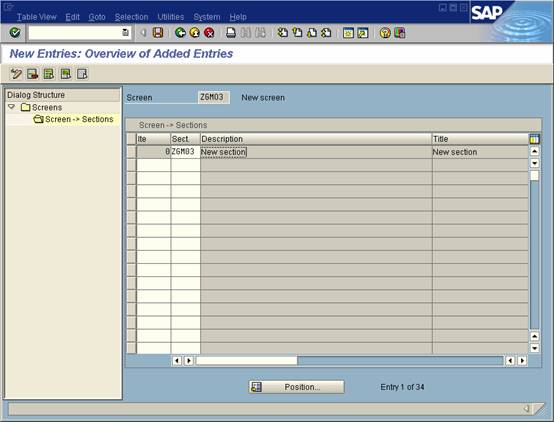
� Input new entry and give it a description and title
�
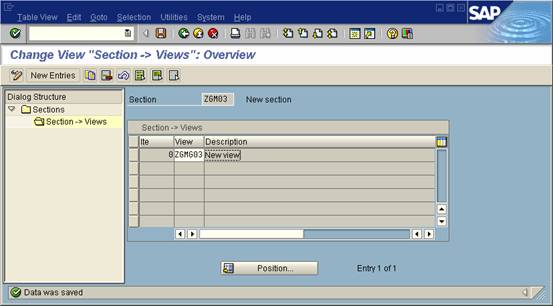
Go back to main Sections screen, select your new
entry and double click on the
Section-> Views folder option from the left column. Now enter the new view
you
created previously.
�
Return to main BDT customizing screen and select
'Screens'(GMS5). Then click the
'New Entries' button
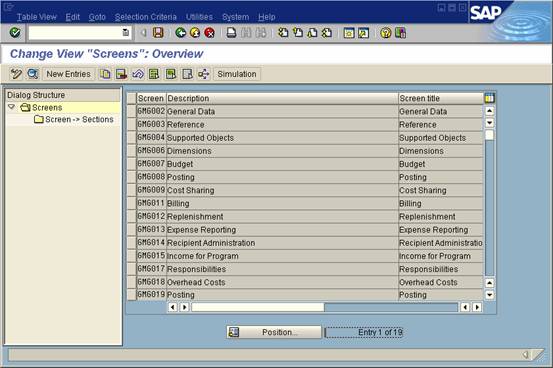
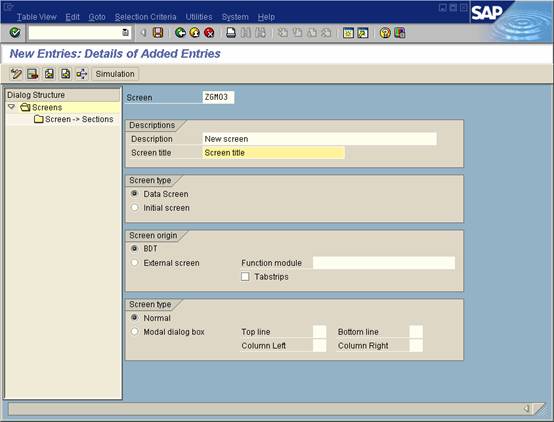
� Enter details for you new screen
�
Go back to main Screen screen, select your new
entry and double click on the
Screens-> Sections option from the left column. Now enter the new section
you
created previously.
�
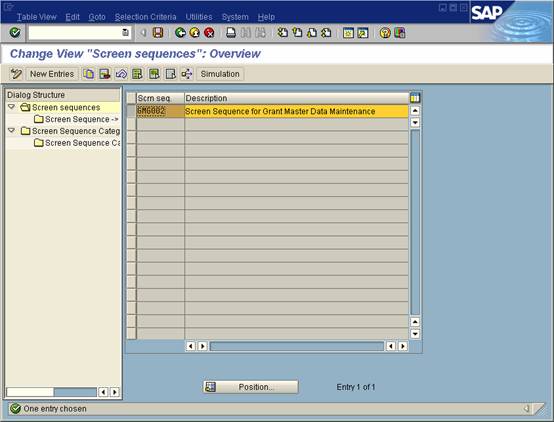
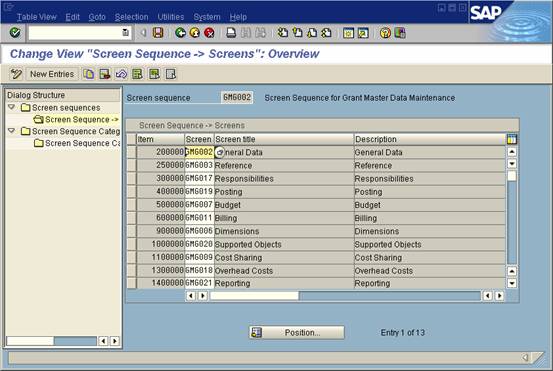
Return to main BDT customizing screen and select
'Screen Sequence'(GMS6). Then
select the screen sequence entry and double click on the Screen Sequence ->
Screens
folder option from the left column.
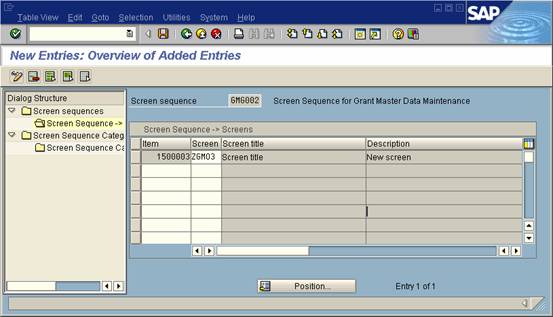
� Add your screen to the sequence by clicking on the 'New Entries' button
� Add you new screen to the screen sequence.
�
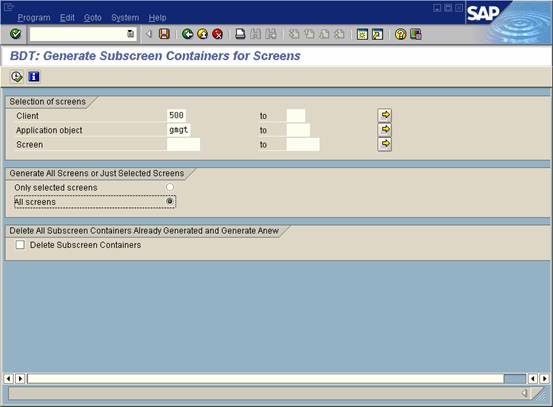
Execute transaction BUSP (click on option from
main grant customizing menu), new
screen will now appear as tab on grant master transaction 'GMGRANT'