
Create basic SAP Workflow
Create basic workflow to display material
Step1 - Execute transaction SWDD
Execute transaction SWDD and press the create button. If this is your first time in this should already be at this point.
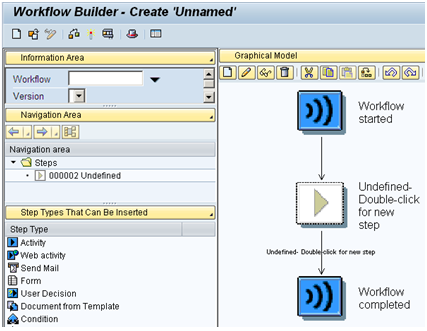
Step 2 - Add 'activity' step type
Either right click on the undefined step->create->activity or drag the activity type step onto it from the left menu.
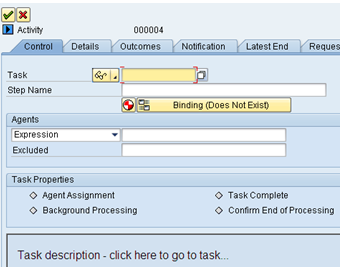
Step 3 - Create task
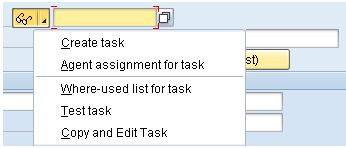
Click on option arrow at side of display icon to create new task
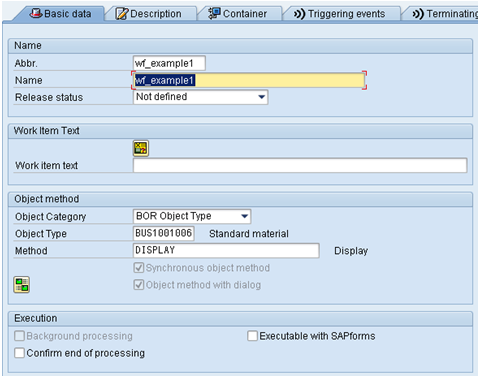
Step 4 - Assign object method
Enter Abbr., Name and desired object category, object type and method. In this example I am using method 'DISPLAY' within object type 'BUS1001006' which displays the material transaction. Click yes on the 'transfer container elements' popup dialog.
Step 5 - Possible Agent assignment
Go to menu option Additional data->Agent assignment->Maintain. From here you can either click on 'Attributes' and assign to General Task or click on the 'Create agent assignment' icon to assign a specific agent (user, role, job etc). We are going to do the second option
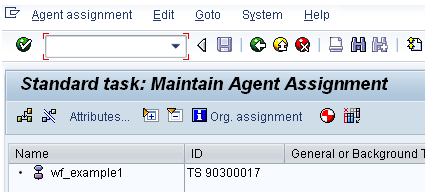
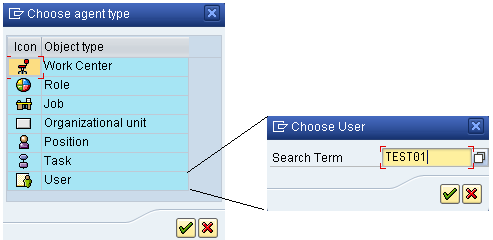
Step 6 - Create possible agent assignment
Click on the 'Create agent assignment' icon and choose the user option from the popup window, then enter your own SAP user name. That's agent assignment donbe so click the back button to return to task details screen
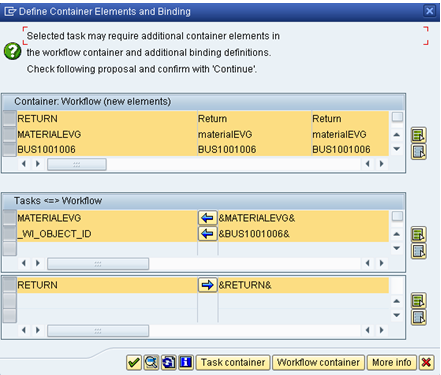
Step 7 - save task
Within the task press save followed by the back button to return to the step screen. You should see the following popup screen to define container elements and binding. Simply press the green tick to accept the defaults.
Step 8 - Assign actual agent and save
Within the Agents section, click on the 'Expression' dropdown and select workflow initiator (expression). This means whoever initiates the workflow will become the agent. Now press the green tick at the top of the step details screen to save this step
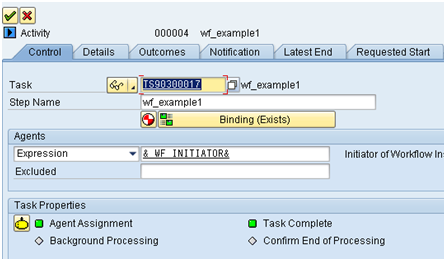
Please note you can also get to agent assignment via this screen by clicking on the yellow egg shaped agent assignment icon on the step screen (above).
Step 9 - Access container
Within the left menu choose 'Workflow Container' to see available containers
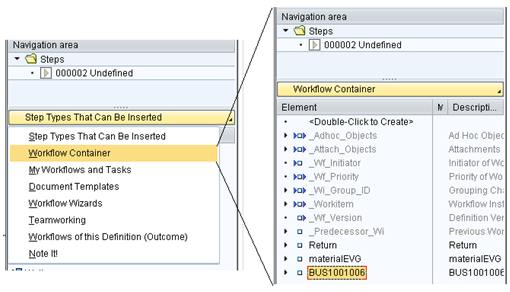
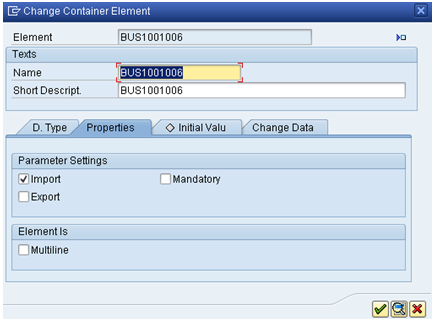
Step 10 - update container settings
Double click on the BUS1001006 container, go to the properties tab and tick the Import checkbox
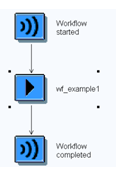
Step 11 - Time to test
First check your workflow model look similar to this
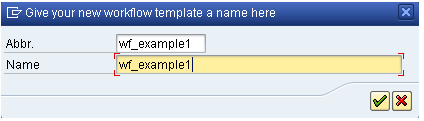
The click on the test button to test your workflow, first time you do this you will be asked for an Abbr. and Name. Just enter what you want here and press ok. Next it will ask for package and transport details, simply fill in as usual.
Step 12 - Executing the workflow
Double Click on the BUS1001006 entry and you will be presented with an input field at below. This is the import parameter you turned on in the container properties. Simply use the input help for the field and enter a material number.

Now when you press the execute button the SAP display material transaction should be displayed for selected material.