
Triggering ABAP WebDynpro inbound and outbound plugs
Below are the steps for adding inbound and outbound plugs to your ABAP WebDynpro view.
Step 1
This exercise builds on the previous excersise 'Adding inbound and outbound plugs to your ABAP WebDynpro'. Which basically shows you how
to create a new WDp component, create an inbound and outbound plug for each of these views and then connect them both together within the window.
Step 2
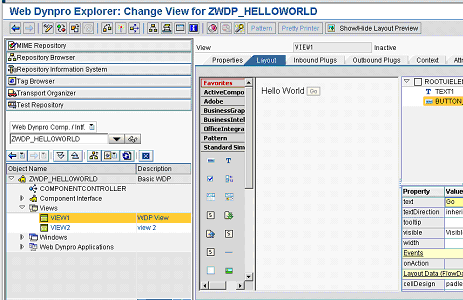
Within the layout tab of your start view (VIEW1), Create a new UI element of type 'BUTTON'.
Step 3
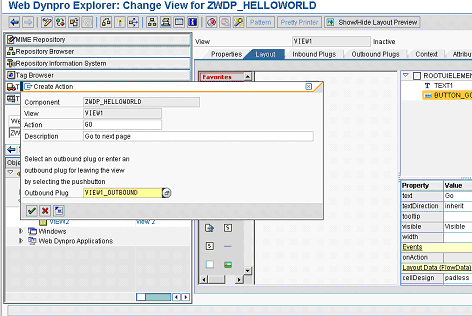
Within the properties section of the BUTTON element Click on the create icon to the right of the onAction property. On the next screen
enter an action code for the action (i.e. GO), now enter description and the name of the outbound plug (VIEW1_OUTBOUND).
Step 4
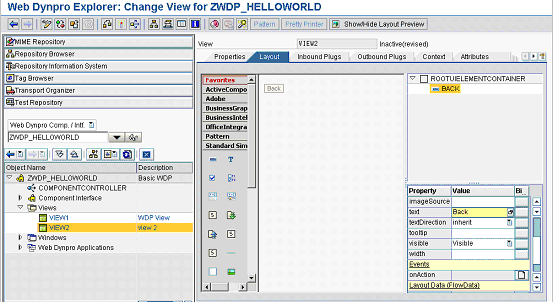
Within the layout tab of your second view (VIEW2), Create a new UI element of type 'BUTTON'.
Step 5
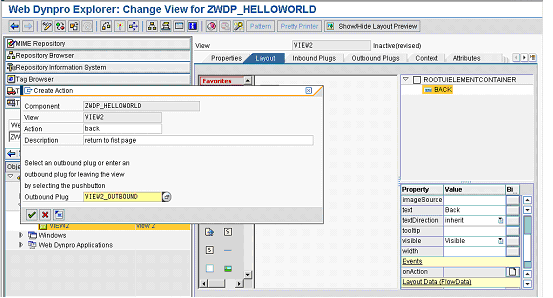
Within the properties section of the BUTTON element Click on the create icon to the right of the onAction property. On the next screen
enter an action code for the action (i.e. BACK), now enter description and the name of the outbound plug (VIEW2_OUTBOUND).
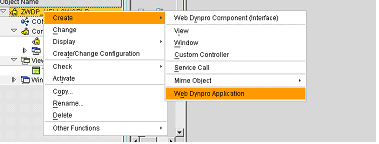
Step 6
Create web Dynpro application
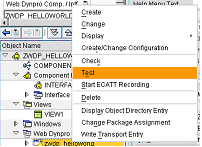
Step 7
Test application
You can also trigger a web dynpro plug manually
using the ABAP code found at this link.