
Consuming a webserve with an SAP VC application
Below are the steps required to consume a webservice within a visual composer application. It is using a webservice called Global Weather available on the webservicex.net
website, but the concept can be applied to any webservice you find, as long as you have the url of its WSDL.
Step 1 - Access the Visual composer
Easiest way to do this is access your SAP portal using the URL similar to http://url.co.uk:501/irj/portal

Then replace the irj/portal section with VC

You will then be taken to the Visual composer development screen

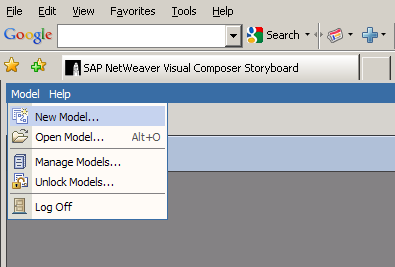
Step 2 - Create a new model
From the menu bar select Model->New Model to create a new VC model
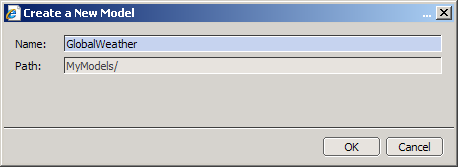
Step 3 - Name your new model
Give your model a name such as GlobalWeather
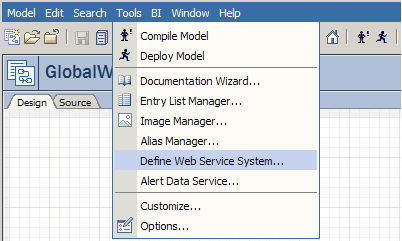
Step 4 - Define a new web service system
Access the menu option Tools->Define web Service System
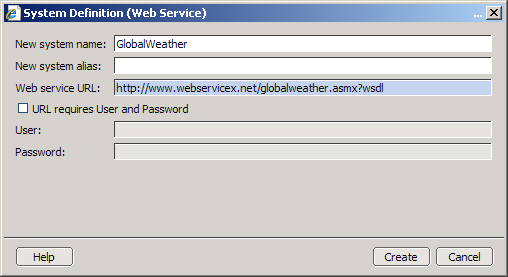
Within here enter a local name for the webservice, the WSDL url of the web service and press Create . For this one the address is http://www.webservicex.net/globalweather.asmx?wsdl which can be found manually if you go to the webservicex website.
Step 5 - Create an iView
Double click on your model to open it up. Now while ensuring the 'Compose' button is selected on the far right hand side of the screen,
drag an iView component onto your VC model.
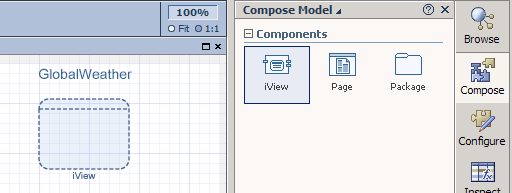
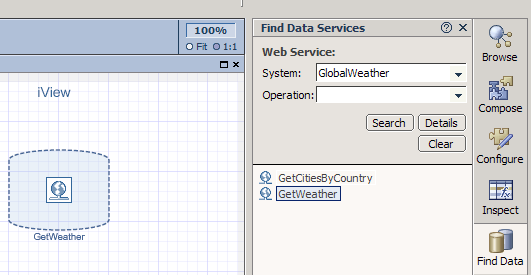
Step 6 - Add webservice
Double click on the iView icon to open it up. Now within the 'Find Data' button on the right hand toolbar search for the webservice you just setup within the system field.
Hit search and drag the GetWeather data service onto your iView.
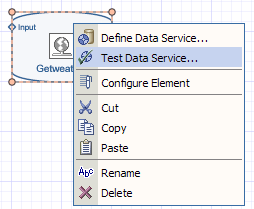
Step 7 - Test webservice
At this point you can test to see if the webservice is working, to do this simply right click on it and select 'Test Data Service'.
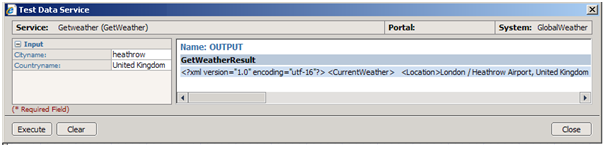
I know it says its gets the weather for a particular city but it really gets the weather for specific airports so enter 'heathrow' into the city name and 'United Kingdom' into the Country name and press enter. You should now get an xml string containing data about your selected destination.
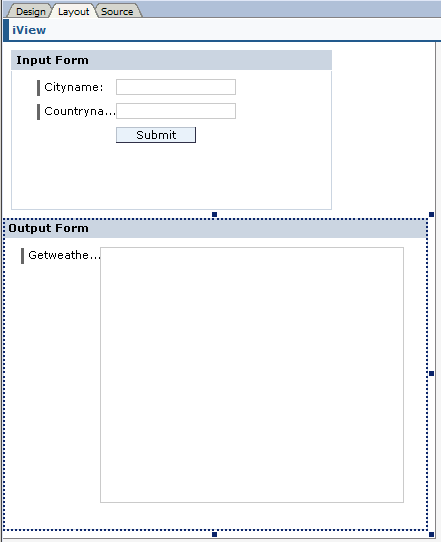
Step 8 - Create input and output forms
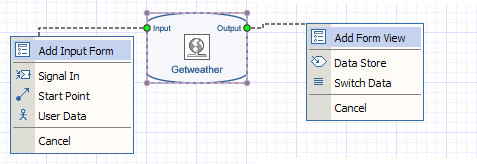
Click and hold on the input node of the GetWeather data service and drag your mouse out to the left. A red broken line should have appeared, now let go of the mouse and select 'Add Input Form'.
Repeat this process for the Output node and select 'Add form View'.
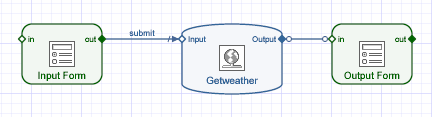
Your screen should now look like this and thats pretty much it, you have consumed a webservice. Simples!
Step 9 - Compile and deploy
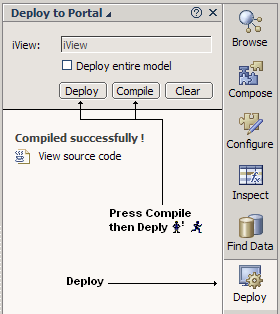
Within the deploy button on the right hand toolbar select compile and then deploy. Alternatively you could use the compile and deploy buttons on the top toolbar.
Step 10 - Change runtime compiler
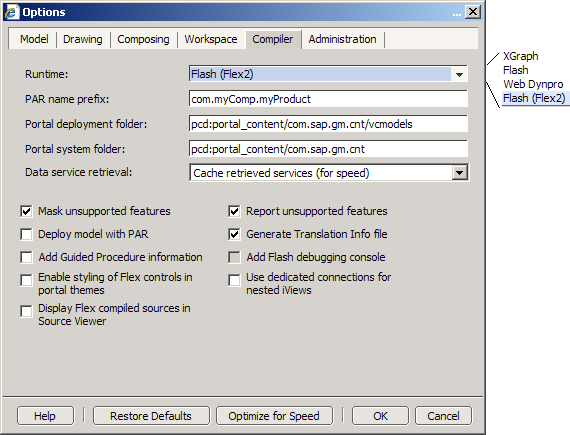
You may recieve an error at this point, saying somthing about flex. This may be solved by changing the runtime compiler to 'flex2' or even 'Web Dynpro'. Make this change then complie and deploy it again.
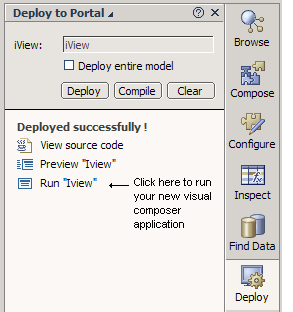
Step 11 - Run your VC application
Right thats it, now click on the Run "iView" link displayed in the deploy to portal window and your application should appear.
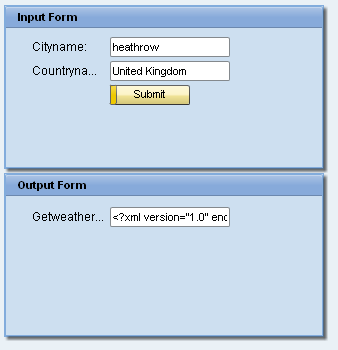
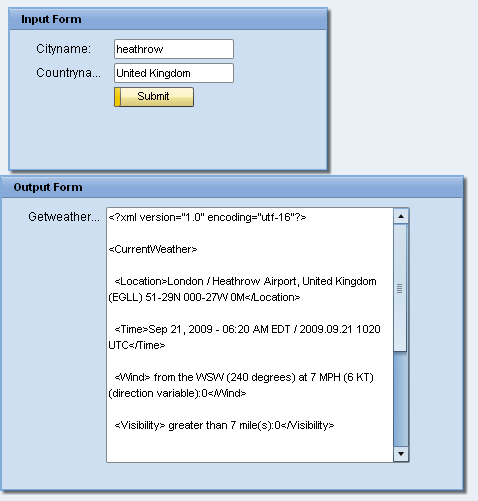
Step 12 - Populating the application screen
The application is fairly straight forward, simply enter 'heathrow' into the Cityname and 'United Kingdom' into the Country name and press Submit. The XML result
will be returned into the small input field defaulted onto the output form. I will now show you how to change the type and size of this field.
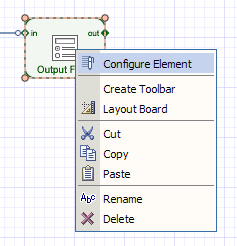
Step 13 - Configure output element
Return to your VC development area, right click on the Output form and select Configure element.
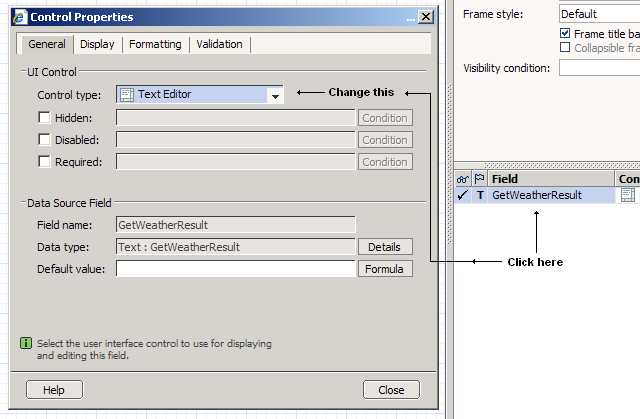
Step 14 - Change element type
Double click on the GetWeatherResult field within the bottom right hand window. Now change the Control type to 'Text Editor'
Step 15 - Change element size
Within the Display table change the HxW(pxls) value to '300 x 250' or what ever you want it to be and close the window.

Step 16 - Modify output layout
Within the Layout tab of your main development area, expand the 'Output form' so that the screen area expands to accommodate its larger size.
Step 17 - Compile and deploy again
Now compile and deploy the application again and the output should now reflect the changes made.
 Click here to create a basic VC application to call an SAP BAPI / RFC.