
Consuming a temperature conversion webserve with an SAP VC application
Below are the steps required to consume the temperature webservice located on the w3schools website http://www.w3schools.com/webservices/tempconvert.asmx?WSDL. The websservice takes a temperature value in celsius as its input
and then provides the value in fahrenheit as its outpit.
Step 1 - Access the SAP Visual composer
Easiest way to do this is to access your SAP portal using the URL similar to http://url.co.uk:501/irj/portal then replace the irj/portal section with VC

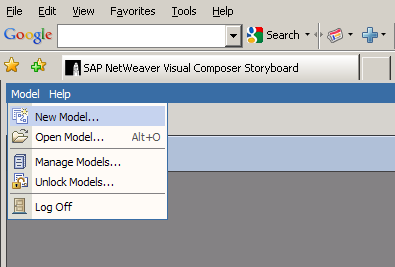
Step 2 - Create a new model
From the menu bar select Model->New Model to create a new VC model, then give it a name such as TempConv
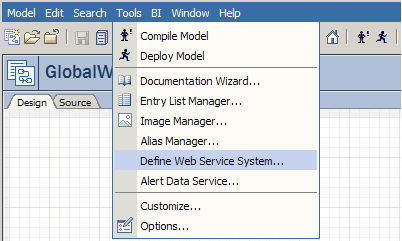
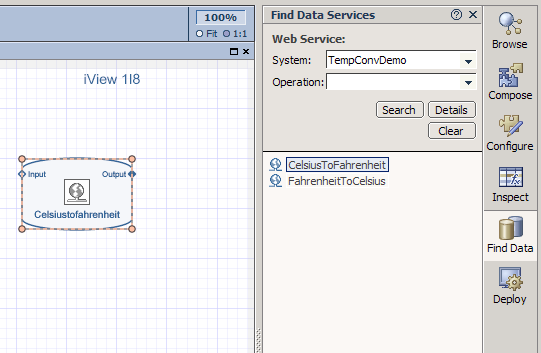
Step 3 - Define a new web service system
Access the menu option Tools->Define web Service System
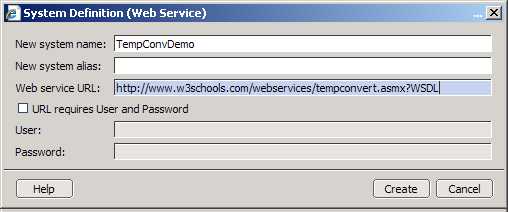
Within here enter a local name for the webservice(i.e. TempConvDemo), the WSDL url of the web service and press Create . For this one the address is http://www.w3schools.com/webservices/tempconvert.asmx?WSDL which can be found manually if you go to the w3schools website.
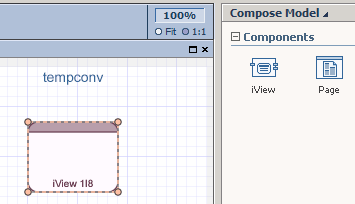
Step 4 - Create an iView
Double click on your model to open it up. Now while ensuring the 'Compose' button is selected on the far right hand side of the screen,
drag an iView component onto your VC model.
Step 5 - Add webservice
Double click on the iView icon to open it up. Now within the 'Find Data' button on the right hand toolbar search for the webservice you just setup within the system field.
Hit search and drag the CelsiusToFahrenheit data service onto your iView.
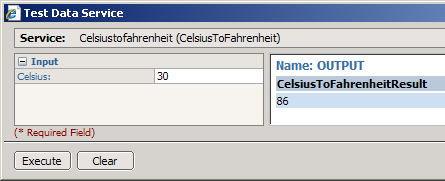
Step 6 - Test webservice
At this point you can test to see if the webservice is working, to do this simply right click on it and select 'Test Data Service'. Enter a celcius value and press execute.
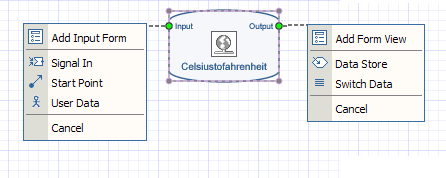
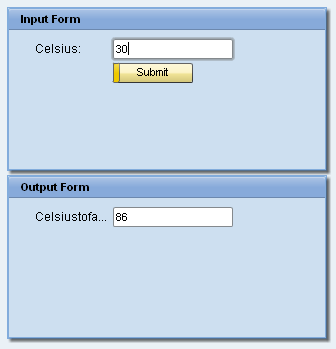
Step 7 - Create input and output forms
Click and hold on the input node of the CelsiusToFahrenheit data service and drag your mouse out to the left. A red broken line should have appeared, now let go of the mouse and select 'Add Input Form'.
Repeat this process for the Output node and select 'Add form View'.
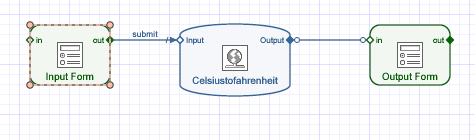
Your screen should now look like this and thats pretty much it.
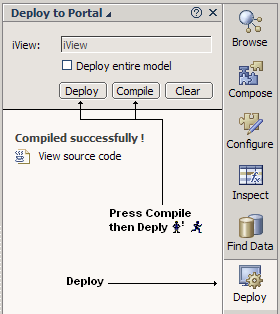
Step 8 - Compile and deploy
Within the deploy button on the right hand toolbar select compile and then deploy. Alternatively you could use the compile and deploy buttons on the top toolbar.
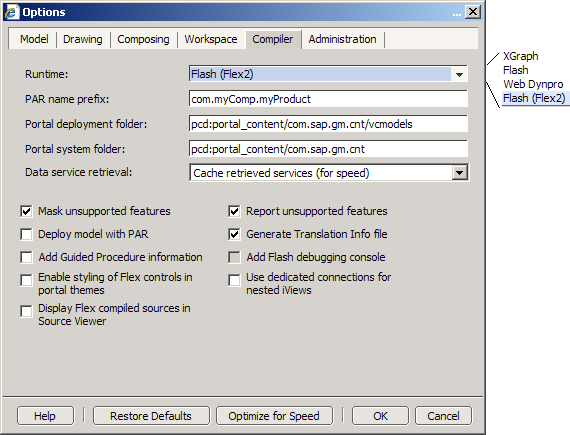
Step 9 - Change runtime compiler
You may recieve an error at this point, saying somthing about flex. This may be solved by changing the runtime compiler to 'flex2' or even 'Web Dynpro'. Make this change then complie and deploy it again.
Step 10 - Run your VC application
If the application has not executed automatically click on the Run "iView" link displayed in the deploy to portal window and your application should appear.
 Click here to see another exmple of consuming a web service within your VC application but this one also shows you how to alter the output layout.