WebDynpro context for creation of screen field including standard search help
Below are the steps required to create a context object within your ABAP webDynpro, this is then used to implement a user input field on the web dynpro
VIEW. Also includes demonstration of how standard SAP search helps are implemented automatically from the data dictionary element used as a
reference for the context.
Step 1 - First create a basic web dynpro application
Create a new web dynpro application ensuring it has at least one view and window and executes ok
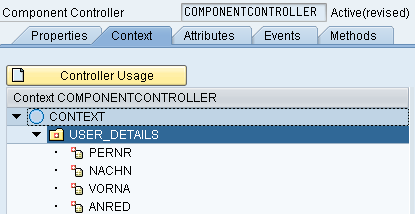
Step 2 - Create context node globally within component controller
Double click on the 'COMPONENTCONTROLLER' and select the Context tab.
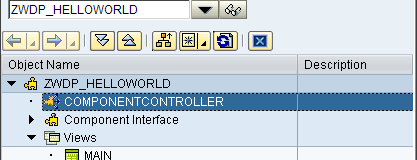
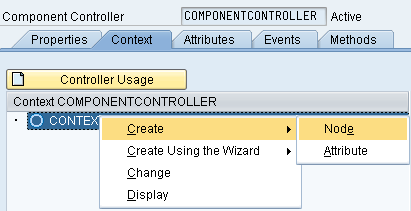
Now right click on the top level CONTEXT node and select Create->Node.
Step 3 - Context node details
Give the node a name (USER_DETAILS), leave properties as default and enter a dictionary structure(PA0002). For future reference if all your required fields are not in one structure
i have found the best way is to create your own Z structure and add all the fields to this. This also give you more freedom
to change field labels/size at a later date as they will not be refering to SAP standard structures, tables etc. But for this example
we will use PA0002 as the base structure.
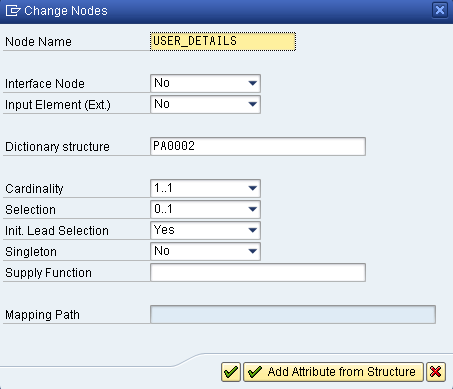
Step 4 - Choose node attributes
Now press the 'Add Attribute from Structure' button and select your required fields, in this case PERNR, NACHN, VORNA and ANRED
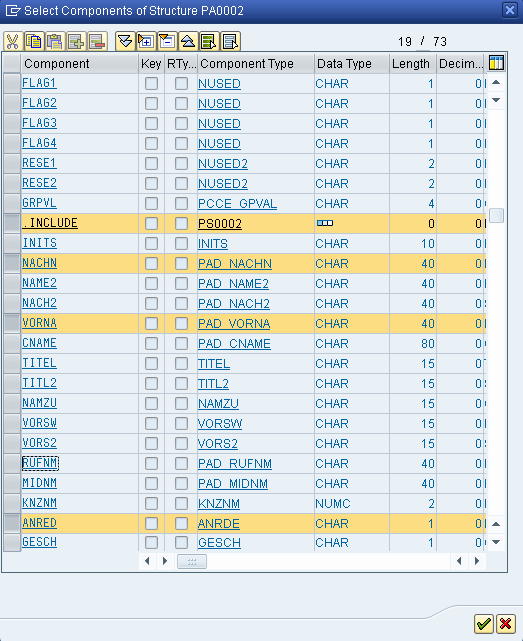
Press the green tick and your node should be created.
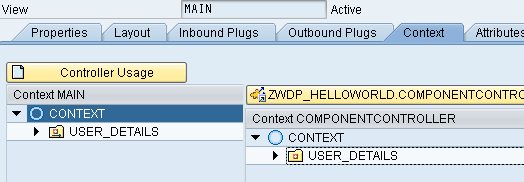
Step 5 - Assign COMPONENTCONTROLLER context to VIEW context
Within your view select the 'Context' tab, now left click drag the created COMPONENTCONTROLLER context from the right window
and drop it on the view context on the left. A message will popup asking if you want to create mappings, click ok and the
context(USER_DETAILS ) should then appear under the context node on the left.
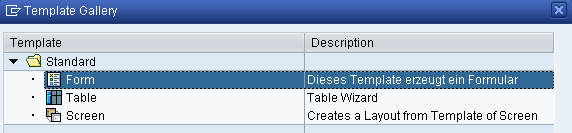
Step 6 - Add fields to webDynpro layout using the wizard
Within the 'Layout' tab of your view select the 'ROOTUIELEMENTCONTAINER' node and press the wizard button(magic wand).
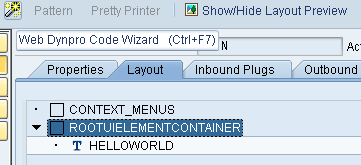
Select the form option by double clicking on Form
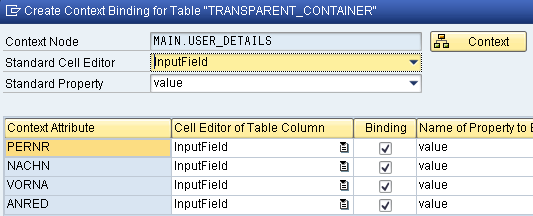
Step 7 - Select the context for wizard
Now click on the 'Context' button and select the appropriate context element (USER_DETAILS)
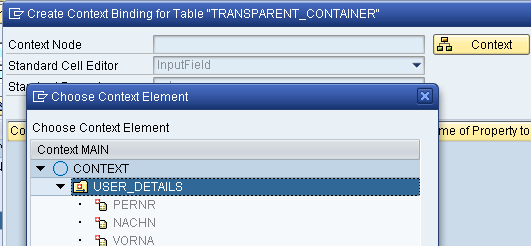
Ensure the binding checkbox is check for the fields you would like to appear on the screen
Step 8 - Ensure TEXT_VIEW is set to matrixHeadData
Within the layout of your view expand the transparent_container created by the wizard and select the 'TEXT_VIEW' element, now
ensure the layout data is set to 'MatrixHeadData'

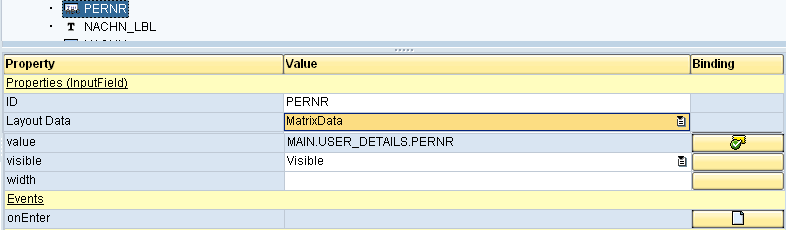
Step 9 - Add event to field(pernr)
Within the properties of the PERNR field click on the create button next to the onEnter event.
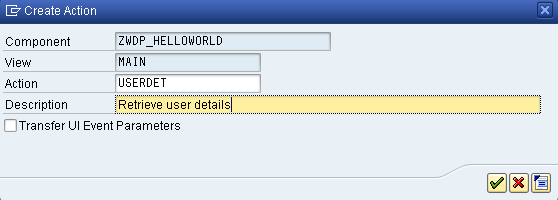
Step 10 - Create Action / Event
Give your new action(USERDET) a name and description
Step 11 - Action code
Add the following code to your action method. Accessed via action tab or methods tab.
 Data: context_node type ref to if_wd_context_node,
        ld_pernr type pernr-pernr,
        wa_userdet type if_main=>element_USER_DETAILS.


* Retrieve value of webDynpro field
  context_node = wd_context->get_child_node( name = 'USER_DETAILS').
  context_node->GET_ATTRIBUTE( exporting NAME = 'PERNR'
                                 importing value = ld_pernr ).
  if not ld_pernr is initial.
    select single anred nachn vorna
      from pa0002
      into CORRESPONDING FIELDS OF wa_userdet
      where pernr = ld_pernr.
  endif.

* Populate webDynpro field(s)
  context_node = wd_context->get_child_node( name = 'USER_DETAILS').
  context_node->BIND_STRUCTURE( wa_userdet ).
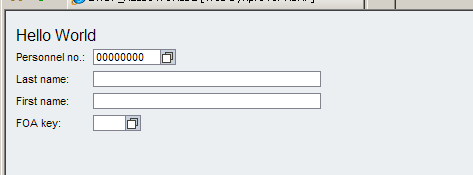
Step 12 - Save and activate
Now save and active your webDynpro application. Right click on the Application and select test.
You should now see the following htm page
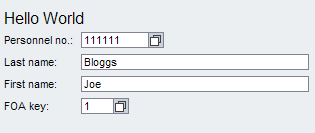
Enter a personnel number and press enter, if valid the fields should be populated as follows
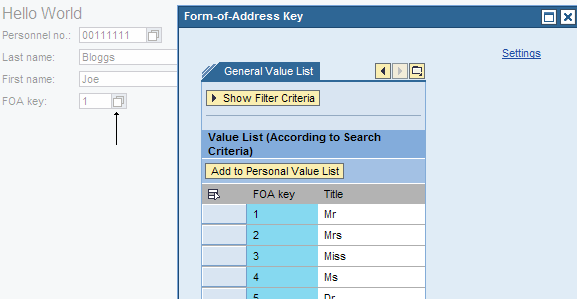
Step 13 - Search Help
As you can see a couple of the fields have a searchhelp button which when clicked on provides the user with a
popup window allowing them to search for valid input field entries.